FULLY CUSTOM


How to Build A Safe Room In An Existing Home
Add A Safe Room To Your Home in 2022
Last Updated January 9, 2022
Just because you’re living in an existing home does not preclude you from upgrading your residential security to include an impenetrable safe or panic room. Our team can guide you in how to build a safe room in your existing home using our wide range of reinforcement materials and expertise.
How to Build A Panic Room:
- Choose a room that is quickly accessed and easily secured
- Determine threats you may face
- Select secure walls and windows
- Select secure entry door
- Install components
- Create and practice an emergency action plan
Planning Your Home’s Safe Room
Follow our guide to get started in planning a panic room for your home.
Step 1: Choose Safe Room Location
- Try and pick a room with no existing windows to help conceal your new safe room’s presence and minimize potential entry points. If the only suitable room has windows, this still can be solved. Our team will guide you to upgrading towards forced entry resistant or bullet-resistant windows for the location.
- Place your panic or safe room as close to frequented living spaces as possible. You’ll want the walk in safe room rapidly accessible in the case of an emergency. Seconds can be of the essence. We recommend locating your panic room on the same floor as the bedrooms of your home.
- Attempt to camouflage your safe room as much as possible. Discretion will reduce potential threats – more so than the amount of steel protecting you. Consider the room’s location – where would a criminal not expect to find a safe room or closet? Some clients go further and disguise their safe room door.

Learn More: Basement Safe Rooms | Corporate Safe Rooms
Step 2: Determine Possible Threats
All subsequent decisions about building a panic room and protecting your walk in safe room will depend on what threats you wish the space to protect you from. Are you primarily looking to protect valuables, people, or both? Do you expect criminals to use hammers and axes to gain entry, or might you be under attack from handguns or even assault rifles?

Step 3: Select Panic Room Windows and Walls
- Construct the safe room’s walls out of materials that can withstand force entry and firearms. If you are retrofitting an existing home, it may be hard to construct concrete walls. This is no problem; there are great retrofit options. We offer ballistic panels made out of fiberglass or Kevlar.
- These panels are relatively easy to install and are cost-effective. Unlike steel, contractors can cut them on-site to fit the room’s nuances. The material doesn’t interfere with Wifi and cellular signals. Panels come in a variety of bulletproof and forced entry resistant levels.
- Often clients select a room without windows – such as a closet or basement area – but many of our clients have windows in their safe room. For example, when a panic room doubles as a bedroom or home office, there are usually windows present.
- Ballistic and blast windows can replace existing annealed windows to provide an equal protection level as the room’s other security features. The most cost-effective ballistic windows are fixed assemblies, usually called “picture windows“. Generally, windows of these types are fixed and inoperable. However, we offer some of the only operable bulletproof windows, which some clients desire for ventilation and escape route purposes.
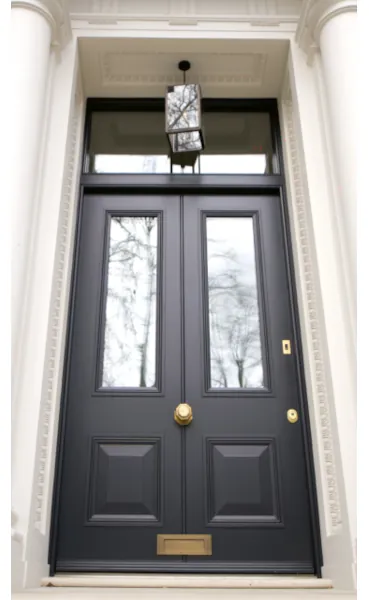
Step 4: Select Secure Entry Door
- The door to your panic room is the most important security feature of your walk-in safe room. It is the first place that criminals will attempt entry through for it is the only security component of the room that is literally designed to allow people to pass through.
- The door locking capabilities will depend on your planned use of the room. If planning to secure valuables, the door must be lockable from the outside. The unlocking method can be sophisticated though a convenient one makes use of the panic room for a greater amount of one’s valuables more likely.
- If planning to only secure people during an emergency the door need only be lockable from the inside. This allows the door to be unlocked during normal use for fastest possible entry.
- Of course, many safe rooms are used for both purposes. In these cases look to have an easy to access lock for day to day use while engaging a more robust locking system when away for an extended period or during an emergency.

- The door must be properly secured to the surrounding wall, ensuring the wood or metal door jamb is of sufficient thickness. The door should use a high security lock which has multiple locking points. This will minimize ability for the pins to be disengaged.
- The door leaf itself must also be able to withstand abuse without allowing entry. Proper thick gauge steel should be used to prevent pass through.
Learn more: Underground Bunkers | Interior Security Doors
Step 5: Install Safe Room Components
- All of our materials we provide for safe rooms are designed to be conveniently installed by a local contractor or sometimes even a DIY homeowner. They are factory assembled as much as practically possible. Someone with experience installing standard doors, windows and walls will be able to use the same skills for high security versions. However, it is highly recommended to work with a licensed and bonded contractor.
- Note also that most security components are much heavier than standard features, which makes handling them more cumbersome.
- Additionally for certain components – like doors with multi-point locks – it is important to work with various precise measurements. The most important measurement to determine when manufacturing doors and windows is the rough opening of the panic room.
- Our team can help you plan all of this and be in direct contact with your contractor to advise on design and installation.
Step 6: Create (and Practice) an Emergency Plan
- A safe room must be used to be effective. We recommend creating a basic plan to maximize the value of your safe room. With regards to storing valuables, determine some rules of thumb about when the door will be locked and what you’ll keep inside.
- With regards to protecting your family, make a few rules of thumb on which type of possible threats you will use the room for. If you hear a strange noise in the night should your family head there immediately? Might you want someone in the family in charge of bringing small children to the room?
- What method will you use to alert authorities? What method will you use for an “all-clear”.
- Don’t forget to have a line of communication to the outside world. An extra cell phone, radio or dedicated phone line will all allow you to call 911 once you are securely in your walk in safe room.
Additional Ideas for Stocking Your Safe Room
- As you may be in the room for a long time be sure to have food and water. A minimum of three gallons of water per person will allow for a lengthy stay.
- Store nonperishable food items in the safe room.
- A small medical kit would also be useful. You can also add bulletproof blankets and other necessary armor.
- Periodically rotate your supplies so that nothing expires
- Also consider having a flashlight and other emergency items.
How Much Does A Panic Room Cost?
A panic room’s cost depends on the size and how secure its components are. An 8′ x 10′ panic room may cost between $9,000 – $40,000 for high security walls and door, plus an additional $3,000 – $20,000 for expert installation. Ballistic windows add additional cost. Additional, more exotic features such as over pressure filtration systems, automation and luxury interiors can greatly increase the overall price.
Ready to get a quote on your home panic room project?
Contact Us