FULLY CUSTOM


How To: DIY Panic Room & Safe Room
While structurally safe due to strict national housing codes, most residences in the USA are highly vulnerable to human attack.
Fortunately, even those with limited building skills achieve high level security by creating a DIY safe room
How To Build A DIY Panic Room:
New Build vs Retrofit
New Build vs Retrofit
New Construction or Retrofit?
Typically, a DIY safe room project will be undertaken after a home is already built. Though this results in some technical limitations, there still are numerous options for creating a secure space. The various components of a secure strategy will vary with the overall budget and your personal expertise (one can somewhat compensate for the other).
At Fortified Estate we specialize in helping DIYers create their own safe or panic room. You don’t need to spend tens of thousands of dollars to achieve safety for your family. We are happy to review your particular situation (including blueprints and pictures, if available) to share with you our ideas.
To get started, start thinking about these key factors in advance of reaching out to our team.
Step 1: Identify Safe Room’s Purpose
Recommendations:
There are various reasons different clients build safe rooms or build panic rooms, including:
- Protecting their family from a planned attack (such as a kidnapping attempt or a hate crime)
- Protecting their family from spontaneous attack (such as an opportunistic burglar or a spreading riot)
- Protecting valuables from burglary (such as fine art or firearm collections)
- Protecting their family from a natural disaster (such as a tornado)
It is valuable to consider the intended purpose of the room carefully. Doing so will guide your decisions about building your DIY secure room. For example, it will influence:
- Where to locate your panic room
- What type of fortifying materials to use
- What access control systems to use
- Security procedures for the room
Common DIY Errors
Media attention and visual saliency often lead homeowners to overestimate / underestimate the probability of various threats, leading to non-optimal safe room design.
Various goals are often merged into one, leading to a secure space not adequately protected against any specific threat.

Step 2: Choose Safe Room’s Location
The optimal location of your safe room is different depending on the purpose of the room.
If looking to protect people, consider these tips :
- Use house level that the most vulnerable people stay, such as your children’s rooms area.
- Locate the room as close to where people spend their time in the home, such as bedrooms
- Ensure the path to the safe room does not encounter intruder access points
- Plan to blend the security nature of the room into an existing room.
If protecting valuables:
- The room does not need to be proximal to people
- Consider using locations with existing solid walls, such as a basement safe room
- Consider locating the room in an easily disguised location
- Alternatively, for rooms to house oft-used collections – such as watches and jewelry – consider using spaces designed for display, such as a walk-in closet.
Some general tips apply to both. For example, small rooms and rooms with fewer windows or doors are less costly to reinforce. Where possible, the house’s existing structure can be leveraged, such as using a room where some of the walls are heavy exterior ones.
Common DIY Errors
Panic room is located in hard to access area of the house, limiting it’s usefulness.
Closed vault room is in frequently used room (e.g. a garage) leading to it often being unsecured.


Step 3: DIY Panic Room Walls and Doors
There are three main parts to building your do-it-yourself safe room: doors, windows, and walls.
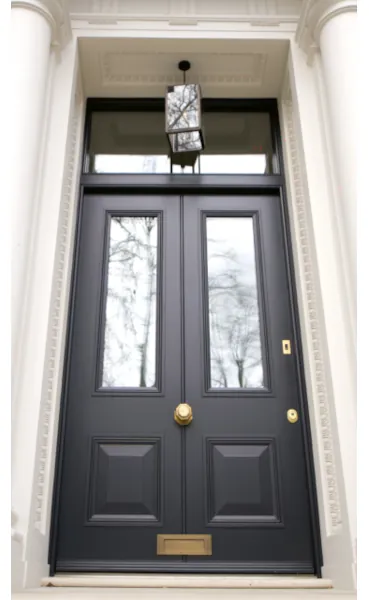
DIY safe room door tips
We consider the door to be the most at-risk point: doors are the one part explicitly designed to allow humans entry.
- Some clients attach lightweight ballistic materials, such as Kevlar, to an existing door.
- Adhering heavier materials (such as steel) to a standard door usually causes door malfunctions due to the added weight.
- Forced entry resistance is the most important for a safe room. This is very hard to achieve unless using a custom vault door built for this purpose.
- If the room is for storing valuables you’ll want the door to be normally locked. The opposite is true for a panic room.
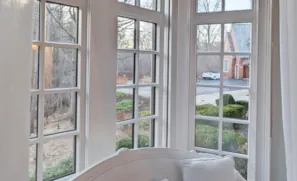
DIY safe room window tips
Ideally, your homemade panic room won’t have windows, but this isn’t always feasible. Fortunately, high-security window options are available.
- Ballistic window film is often marketed, but it is only marginally effective for security, despite its name. Security films are incredibly thin (less than 1/50th of an inch) and merely keep glass together better when shattered. It does not stop bullets or many other weapons from penetrating.
- As with doors, forced entry resistance is the most crucial aspect of the windows. Security requires both the frame and window to be secure. Placing new bulletproof glass in an existing window frame is ineffective (and impractical).
- Fixed bullet-resistant windows are significantly less expensive than operable ones due to the engineering required to manage the massive weight of ballistic glass.
DIY safe room wall tips
- In a new build, cement walls may be an option. For existing homes, modular ballistic panels are the way to go.
- You can purchase bulletproof panels in standard sheet sizes and add them to existing walls.
- Avoid using steel to reinforce your safe room walls. It is exceptionally challenging for a do-it-yourselfer to cut metal in the field, and it will inhibit cellular reception in the room.
Common DIY Errors
Cold, unattractive steel doors are used which draw attention to the room.
Bullet resistance is focused on at the expense of forced entry, leaving the door vulnerable to the most commonly deployed attacks.
Heavy armor is added to a door that doesn’t have adequate hinges and other engineering, making the door hard to swing and it’s locking components to misalign.
The door is confusing or cumbersome to lock, burning precious time during an emergency.
Step 4: DIY Panic Room Supplies
If you intend to build a do-it-yourself panic room, then you will want to consider not only the room’s security but also supplies for keeping your family sustained and occupied during their time inside.
Various elements to preserve humans — that aren’t required when only preserving objects — need your planning, including:
- Ventilation: Arguably, the most urgent concern is airflow. There is a finite amount of oxygen in any small space, especially a tightly sealed panic room. All the more so for spaces that have no ductwork, such as a closet. Consider adding a MERV-rated air filter with ductwork pulling in air from the outside.
- Food Supply: If you expect to use the room long-term, such as during a natural disaster or in a bomb shelter, you will want to stock shelf-stable food. Ensure a variety of foods containing carbohydrates, proteins, and healthy fats are available. Place in sealed containers to avoid damage from pests or water.
- Plumbing Alternatives: if you expect to use the room long term, it pays to think about these concerns in advance of an emergency. Ample amounts of potable water, cleaning water, and sanitary systems are essential.
- Communication Methods: During a potential attack on your home, your family will want to contact the police for assistance as soon as they enter the safe room. Several options are available, including a 911-only cell phone, a landline, and a GPS-enabled phone.
Common DIY Errors
A small room is secured without ensuring an adequate inflow of oxygen.
Stored food is degraded due to insect, rodent or water damage.
The room provides protection but not a convenient way to alert emergency services of the need for help.
